Guides
Step-by-step, by task: starting a club, joining one, running a session, rewards, and handling changes. Each guide says who it is for and what you end up with. Each step matches what's available in CornerMile today. Something already gone wrong? Start with Help.
- Running a venue? A club ready for its first run in about 15 minutes, with a poster to print once it is live. Start with Launch your club.
- Leading runs? Your profile on the club page and the run-day tools, without the admin. Start with Lead a club's runs.
- Here to run? A place on the run you chose in a minute, with no app and no password. Start with Join and say you're going.
Launch your club (15 minutes, then a quick review)
From nothing to a club ready for review, with a printable poster once it's live.
- For
- Venue owners and managers
- You end up with
- A venue, a club, published terms, a regular run and a reward, waiting for the publication check.
- 1Start your free pilot. Enter your work email and the venue's own postcode. We check the postcode against the pilot area before emailing your sign-in link, so an out-of-area venue never ends up with an account it can't use. Tap the button in the email and you're in; the same email carries a six-digit code for when you're reading it on another device. No password, no card.
- 2Name your venue and club. The club's web address comes from its name. You can rename it later and old links will keep working.
- 3Review the terms and waiver. We give you adult-club starter wording; adapt it to your venue and confirm you've reviewed it. Runners accept these when they join.
- 4Set the day, time, meeting point and length of your regular run, weekly or monthly. Future runs appear automatically, so you never have to create the run again.
- 5Pick a reward. A run-day discount is pre-selected because it works; confirm the plain-language summary and you're done.
- 6A real person at CornerMile checks every new venue before its page goes public. We email you straight away to confirm your club is in the queue, and again when it is live, usually within a day. There is nothing you need to do while you wait, and you can keep editing everything from your dashboard.
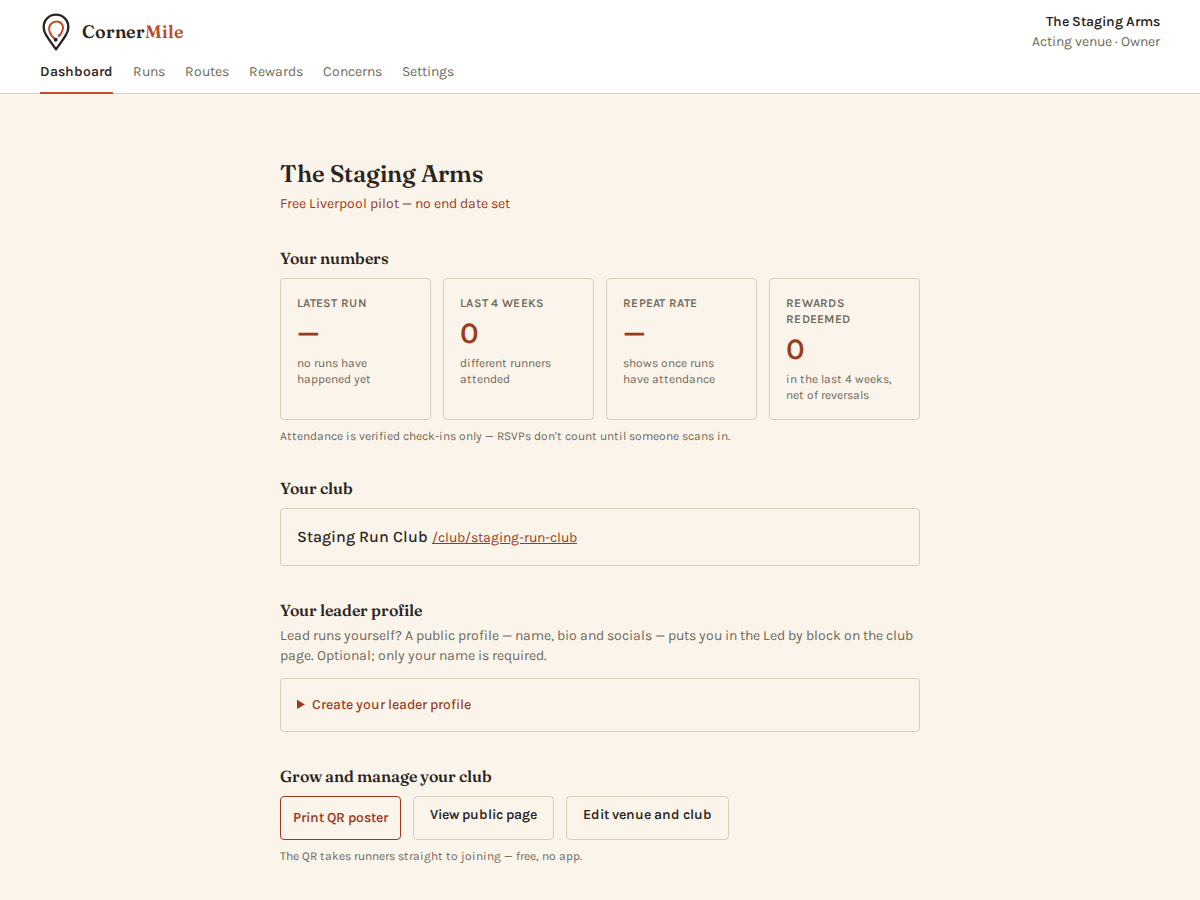
- 7Once the check is done, your club page, poster and join link switch on. Print the QR poster and put it where people gather, such as the counter, entrance or noticeboard. Scanning it takes runners straight to joining.
- 8Add your logo under Settings → Logo and it heads the club page, the printed poster and the club's emails to members. Write a few lines under About the venue and they appear on the club page too.
Join and say you're going
Keep your chosen run through the six-digit-code step.
- For
- Runners
- You end up with
- You are a member, signed in, with your place on the run you chose.
- 1Choose Join and say you're going on an upcoming run. Read the club terms, tick acceptance yourself and enter your email. The exact terms shown are retained for 30 minutes.
- 2Tap the sign-in button in the email, or type its six-digit code if you're on another device. If the venue published new terms while you checked your email, membership waits while you read and accept the new wording.
- 3You return to the run as a signed-in member. Check the current details and press Going yourself. The run's state and capacity are checked again; joining never books a place automatically.
- 4Joining from a check-in QR works differently: you return to the check-in page and still press its check-in button. A saved return page cannot record attendance.
- 5Use an email address you can open on your phone, a personal one if you can. Work and university mail systems sometimes hold sign-in emails back before they reach the inbox or the junk folder.
- 6Once you are signed in, you can set up a passkey from your welcome page: fingerprint, face or device PIN. That device then skips the email next time. It is optional, and the email always works.
Lead a club's runs
From accepted application or invite to your first run out front.
- For
- Venue teams and run leaders
- You end up with
- A public leader profile on the club page, the runs you are leading, and the run-day tools to go with them.
- 1There are two ways in. A venue adds your email as a Run leader from its team page, or you apply to a venue that is looking on the lead page and its owner or manager accepts you.
- 2Sign in with that email: one tap on the sign-in link we send, or its six-digit code on another device. The first time, you land on a short welcome that sets up your leader profile. Only a display name is required; a handle, a bio and social links can wait.
- 3Your profile appears in the Led-by block on the club page. Edit or unpublish it whenever you like from your dashboard. One profile covers every club you lead.
- 4Open Runs in the header to see what is coming up and who is leading it. Step in for a run you can lead, or stand down from one you can't; the run carries on either way and its page names whoever is leading.
- 5On the day, follow Run the session below: open the run's check-in QR, watch who has scanned, and record anyone whose phone died. Emergency contacts members chose to add are visible to you only around the run itself.
- 6If the venue has given you a perk, it is on your dashboard. Show it at the bar and a member of staff records the use. The venue offers and funds it; how generous it is is between you and them.
Run the session
The few minutes around each run that make the club tick.
- For
- Venue teams and run leaders
- You end up with
- Every runner's attendance recorded, including the ones whose phones died, and vouchers redeemed at the counter.
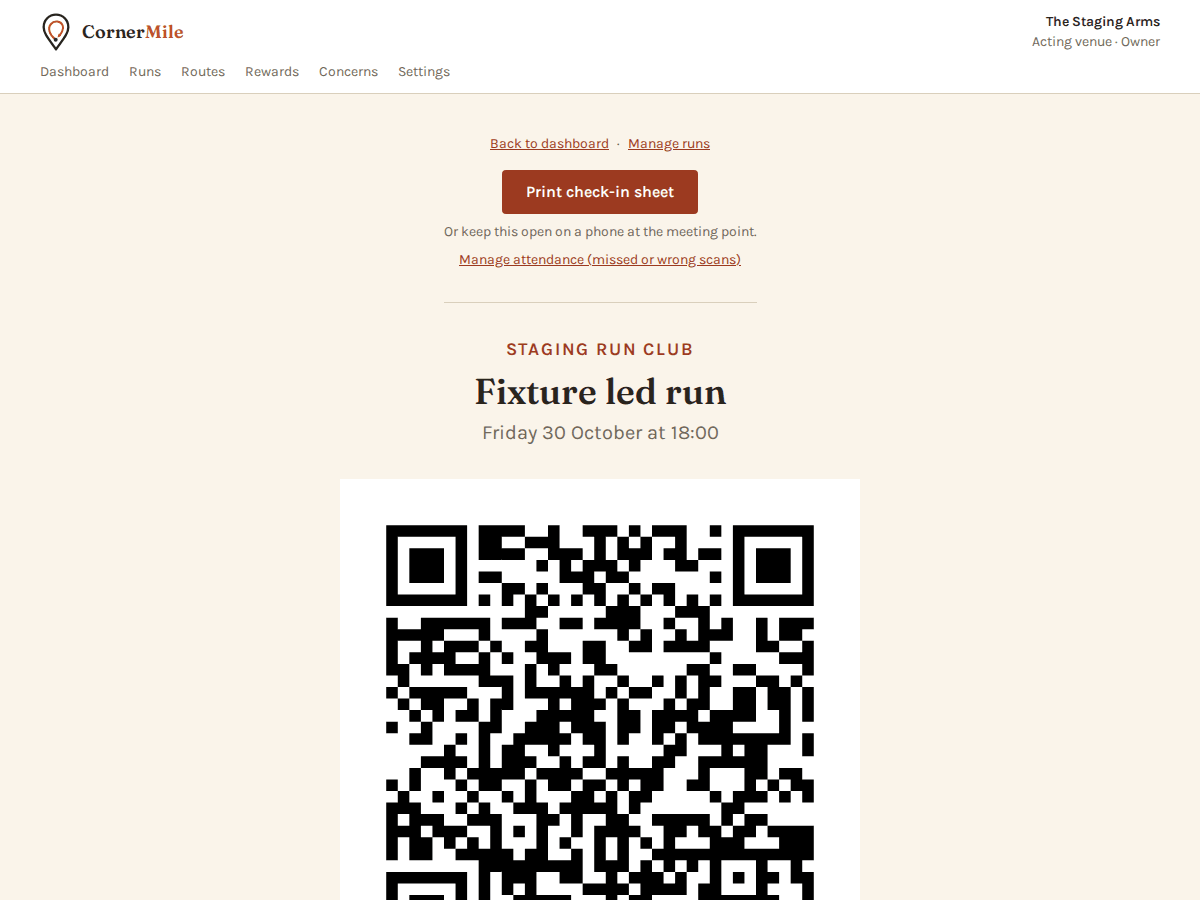
- 1Open your dashboard → the run's Check-in QR. Print it or keep it open on a phone at the meeting point. Prefer one permanent poster? Settings can switch the club to a standing code that never changes.
- 2Runners scan to check in. In scan-out-and-back-in mode, the sheet shows how many are out and how many are back.
- 3Someone's phone died? Manage attendance → record it manually. It's marked, audited and earns rewards like a scan.
- 4Need to reach someone's emergency contact? Run leaders see any contacts members chose to add, on the attendance page, only around the run itself.
- 5After the run: runners open their rewards page and show voucher QRs. Staff redeem in one tap; owners and managers can reverse a mistake.
- 6Afterwards, answer the 30-second post-run check on the attendance page: how many stayed, and was it worthwhile? Rough numbers show whether the run paid its way.
Build your team
Share the work without sharing a login.
- For
- Venue owners and managers
- You end up with
- Managers, staff and run leaders with their own sign-ins and only the access each needs.
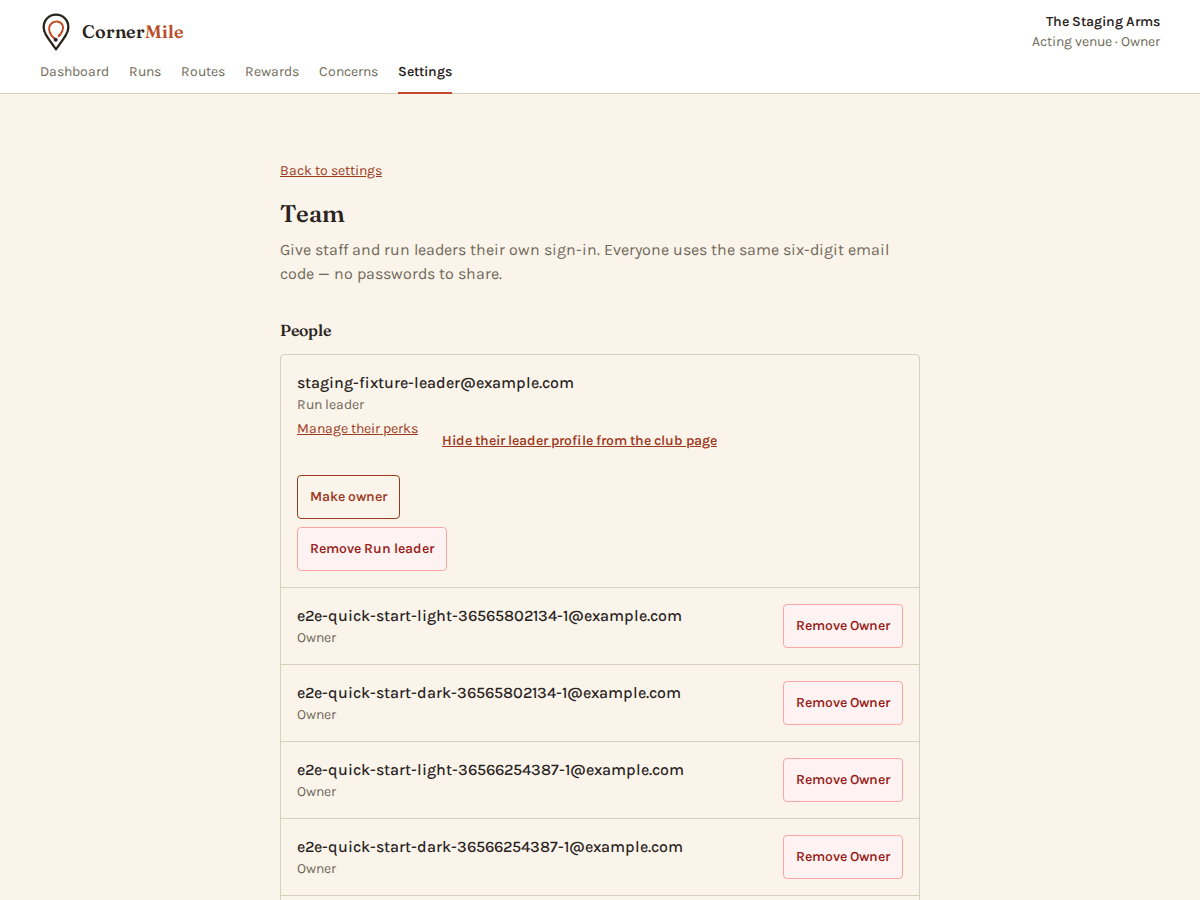
- 1Go to Settings → Manage team, add a teammate's email and choose their role: Manager (runs the club), Run leader (leads sessions), Staff (checks in and redeems).
- 2If they already have an account, the role is added straight away. If not, ask them to sign in at cornermile.co.uk with that email and the role will be added on their first sign-in.
- 3You can remove roles at any time, and every change is audited. A venue always keeps at least one owner.
- 4Handing the venue on? Nobody can be invited as an owner. Make owner, next to a teammate's name on the team page, makes them one, and you choose in the same step whether to step down to manager, stay an owner as well, or leave the team.
- 5Looking for someone to front the club? Tick the option to find a run leader in Settings, then review applications on the team page. Accepting one gives that person the Run leader role.
- 6Once someone is in, the header on every management page shows only what their role can open: run leaders see Dashboard, Runs and Routes; managers and owners also see Rewards, Concerns and Settings.
Make rewards pay their way
The reward is the reason runners come back through the door.
- For
- Venue owners and managers
- You end up with
- A reward that costs what you chose and a redemption figure to set against the till.
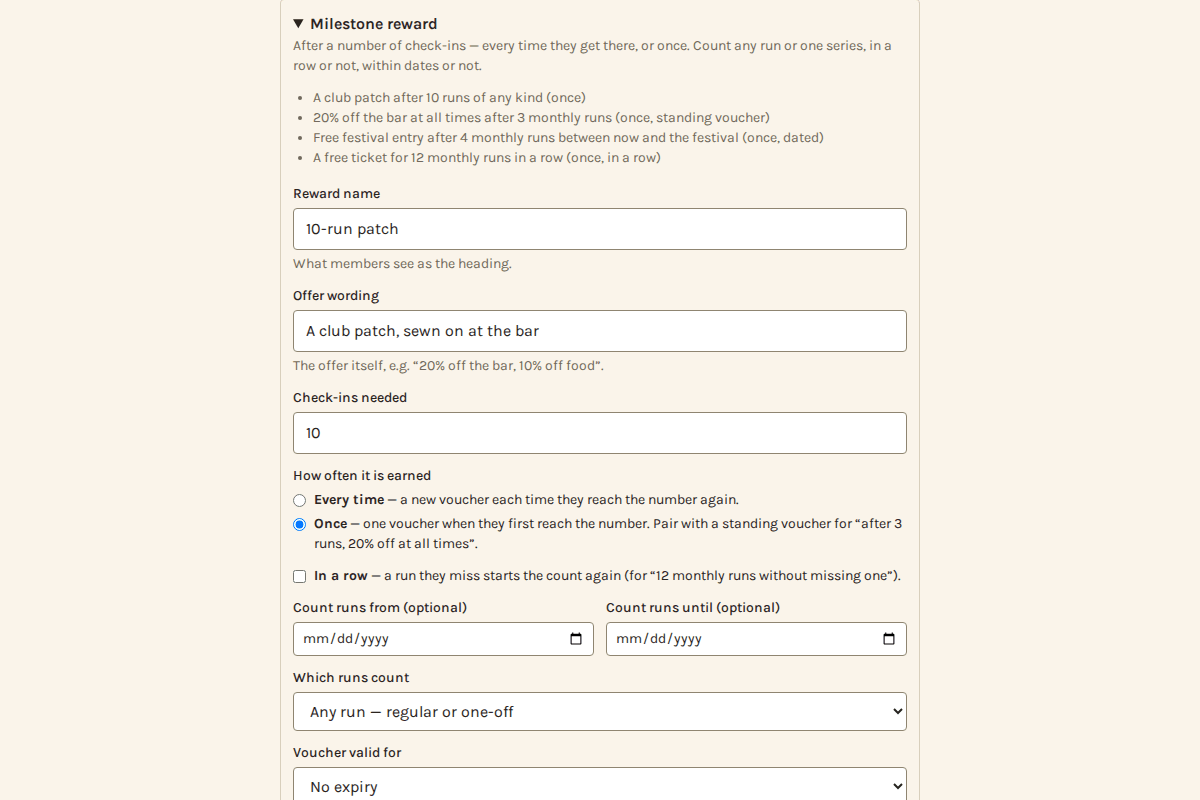
- 1Start with a member discount or the run-day discount. A member discount gives every member a reason to come in on non-run nights; the run-day discount gives runners a clear benefit until midnight on the day they ran, and can carry a line for the friends they bring. Every redemption is a transaction you can measure, and you can pause or change either at any time from Manage rewards. When you want more — a patch after 10 runs, a standing discount after 3 monthly runs, a free ticket for 12 in a row — add a milestone reward and choose which runs count.
- 2Add an active-member perk, such as free coffee for attending regularly, to reward consistency. You can also add a milestone reward every fifth run to give the club a rhythm.
- 3Offer inclusive choices. Morning clubs and non-drinkers earn rewards the same way.
- 4Track repeat attendance alongside reward use. Attendance going up with redemptions in proportion is the pattern you want; redemptions climbing without repeat attendance means the reward's too easy. Neither number proves the reward caused the change — your till and your own judgement do that.
Handle changes and member admin
Keep people informed and keep venue data under control.
- For
- Venue owners and managers
- You end up with
- Runs moved or cancelled with everyone told, and member admin done without a spreadsheet.
- 1Change a run's time or meeting point, or cancel it, from Runs in the header. Runners who RSVP'd receive an automatic service notice.
- 2The same page holds the regular schedule: change its day, time or whether it is weekly or monthly under Regular schedule, and add a special or a race-day social under Add a one-off run.
- 3Run reminders go only to members who opted in, roughly a day before the run; every reminder includes one-tap unsubscribe.
- 4Use single-scan or out-and-back check-in mode per club. Manage attendance records any correction with an audit trail.
- 5Download members, attendance and the current consent-based contact list from Settings → Exports whenever you need them.
- 6Members manage their own email choices and can request account deletion. Venue owners can delete a venue from Settings, with a 30-day recovery window before final purge.
Work out whether it pays
The numbers we can show you, the ones only your till can, and how to put them together.
- For
- Venue owners and managers
- You end up with
- Four numbers and a weekly post-run answer that say whether the night is worth it.
- 1Set the reward so its cost is something you would recognise on a receipt. An offer attached to a purchase tells you more than money off the whole bill, because the redemption and the sale arrive together.
- 2Read the four numbers on your dashboard: verified attendance at the last run, how many different runners came in the last four weeks, what share of those had run with you before, and rewards redeemed over the same period, net of reversals.
- 3The post-run question is optional, and worth the 30 seconds most weeks: roughly how many stayed, and was it worthwhile. It's the only place the night's commercial result gets written down, so a week nobody answers is a week with nothing to look back on.
- 4Pull your own till figures for the run's window, and for the same window in the weeks before the club started. CornerMile never sees your sales, so this comparison is yours to make and yours to trust.
- 5Put the two halves together: the people who stayed at your average spend, less what the week's redemptions cost you. Rough is fine. You want a number you can repeat each week, not a precise one.
- 6Watch the repeat share more than the headline count. Twelve regulars are worth more than thirty strangers once, and the repeat-attendance figure is what tells those apart.
- 7Once a month, download members and attendance as CSV from Settings → Exports if you would rather work it out in a spreadsheet. The data is yours.
Keep it fresh, prove it works
The week-in, week-out habits that turn a run club into repeat custom.
- For
- Venue owners and managers
- You end up with
- A club that keeps changing enough to stay interesting, with the evidence to show it.
- 1Build a route library from Routes in the header. Alternating between just two routes keeps the run interesting. Link to Strava, Komoot or anywhere else, but use public links so runners don't hit a login wall.
- 2Attach one or several routes to each run from Manage runs. When there's a choice, runners pick at RSVP and you can see who is planning what.
- 3Answer the post-run question when you can. "4 of your last 5 runs were commercially worthwhile" is a sentence you can take to the brewery, your accountant, or us, and it only exists if someone filled it in.
- 4Members who opt in appear in your contact list under Settings → Exports. You can email them about what is on beyond the run. Always download a fresh list because it only includes people who are opted in at that moment.
- 5Once a month, download your members and attendance CSVs. Your data is yours, and watching the trend beats guessing.
- 6If a step in setup or joining is losing people, tell us. We already count where people stop, using a random 30-minute reference rather than anything about the person, so a step that keeps going wrong shows up on its own. Those step records are deleted after 90 days and have nothing to do with your members' email choices.
- 7If you or a runner needs help by hand, ask. We note the step and how it ended, with no notes about the person, and a step that needs help twice gets fixed.
When something goes wrong
- Sign-in email missing or expired — recover your sign-in.
- A runner's phone died at the QR — record attendance by hand in Run the session, step 3.
- A voucher won't scan or was redeemed by mistake — Run the session covers redemption and reversal.
- Setup finished but the page isn't public — what the publication check involves.